Alright, I'm watching Charmed again and it always gets me in a Witchy mood. Plus I'm in the heat of the summer and longing for autumn and all the joys that October 31st brings.
Anyways, I've admired the Charmed One's Grimoire for some time and wanted one of my own.
This book is "do-it-yourself" all the way. Many steps can be cut out (like buying an already bound book or using printable spell sheets) but what would be the fun in that?
Supplies: large sketch pad 50 sheets 18"x12"(bought at Walmart for $4.47)
- Dying paper:
- 6+black tea bags (more bags depending on desired darkness of dying)
- Hot water
- Shallow and oblong plastic container (big enough to fit the folded paper)
- Old towel (there will be stains)
- Lots and lots of clothes hangers & string for hanging them
- Binding paper:
- Light colored thin thread & needle
- Ruler (optional- used for making better paper creases)
- Weldbond glue or school craft glue
- Thin string (I bought a large spool at Dollar Tree in the hardware section)
- Multi-color ribbons (optional)
- Cardboard from back of sketch pad
- Paper towel roll
- Scissors
- Decorating the cover:
- String (I used the same from the previous step)
- School craft glue
- Paint brush
- Paper towel (I used 3 regular sized sheets)
- Water
- Bowl for mixing glue & water
- Paint: chose depending on your color pallate
- dark brown
- light brown
- brick red
- black
- gold
- Extra stuff
- post it notes (for mapping out your spells)
- dried herbs & flowers for pressing between pages
Dying:
Step 1: fold the paper in half (hamburger style) before you dye it.
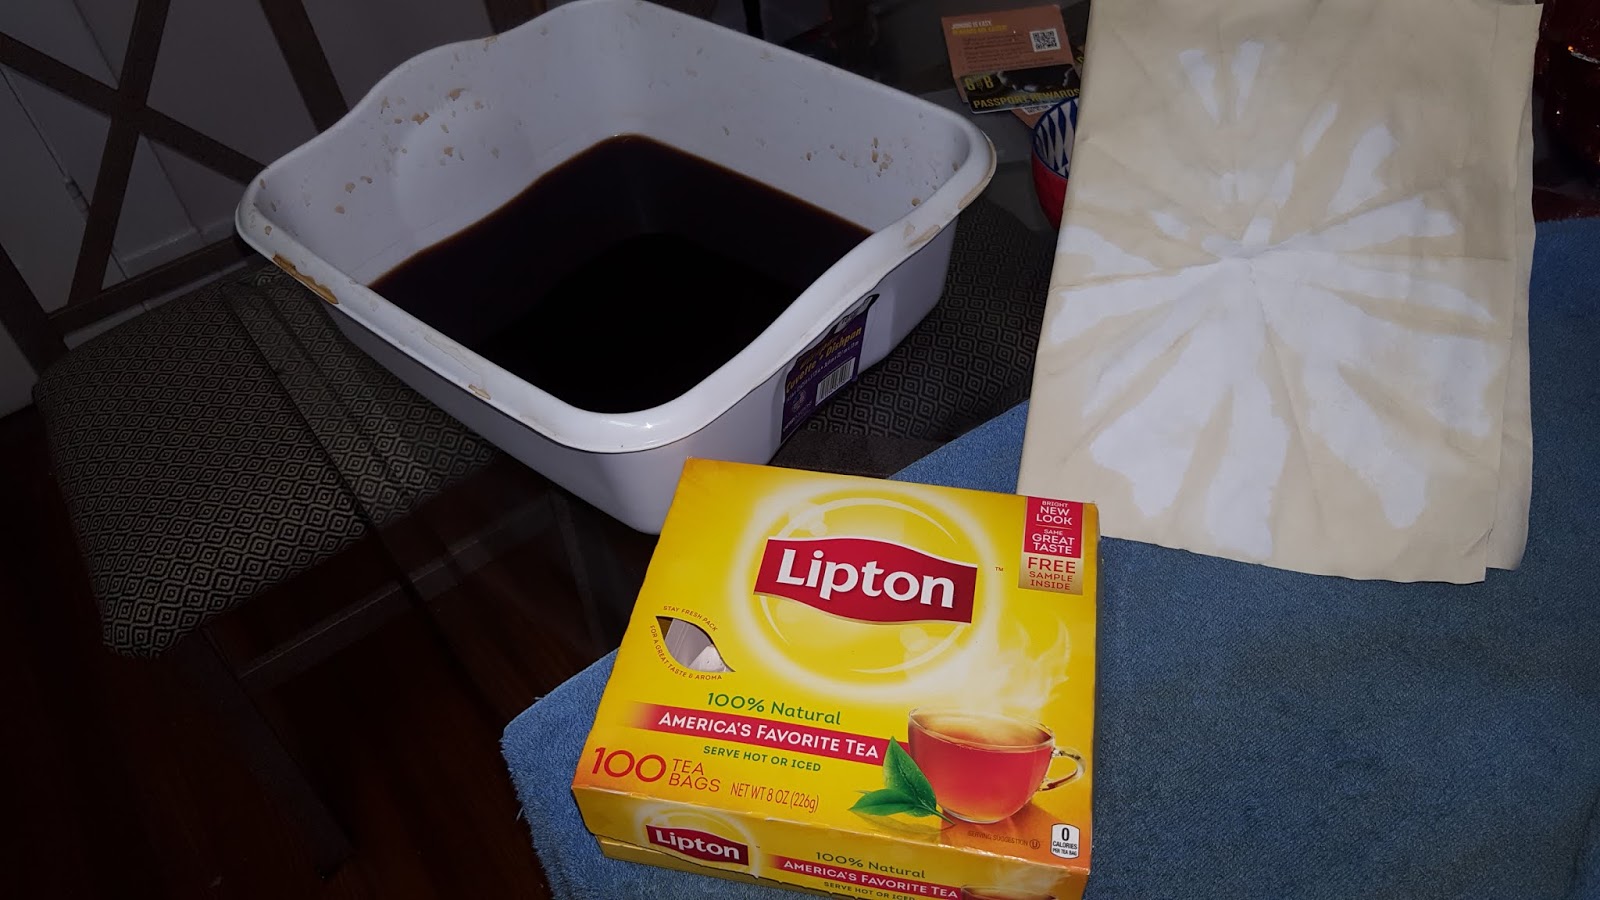
The photo below shows the pre-dyed paper (left) and post-dyed paper (right)
Step 2: Brew your tea. Combine hot water & tea bags (I used 7 large Lipton bags) in the plastic container.
Let the water cool and remove tea bags after giving them a good squeeze.
Step 3: Dip ONE sheet of folded paper in the container, remove and place on old towel.
Fold towel around paper and pat dry. *I tried dying multiple pages that I had already sewed together and the sheets ripped easily and it was harder to dye all the papers at the same time.
Step 4: Hang the wet paper on a hanger, fold the crease on the bar.
I hung string in my kitchen and made an indoor clothesline.
Let dry until the paper feels crisp: about 45 minutes.
A little something extra:
*Add decorations to pre-dyed paper so it will stain longer, thus showing up darker after it is dipped in the tea.
*Use the bottom of a coffee cup for more decoration ideas.
*Crinkle some sheets while in the tea water to give it a more weathered-look.
*Re-dye already dyed paper to make the page darker.
Binding:
Step 5: Re-fold the pages, place four pages (eight folded) together (pictured below).
I ended up with nine folded packs (72 pages in total).
Step 6: Line up all four pages and clip together to secure. Cut a light piece of string double the length of the the pages. Knot the end and start your stitch at the top of the outside of the booklets and poking inside. Exit the inside of the booklet approximately half an inch from the entry point. We want smaller stitches on the inside for aesthetics. Sew the next half inch approximately 2-3 inches from the first and continue the previous steps until you have four stitches down the inside of the booklet. Finish by knotting the string on the outside of the booklet.


Step 7: Line up all of the sewed booklets and clip together. Knot a piece of string 3x the width of the booklets. Start on either side of the booklet and at the first stitch. Thread the string from the outside to the inside by using the same holes from the previous step. Once the string is back on the outside, thread the next hole on the 2nd booklet PARALLEL from the previous stitch. Thread back from the inside of the booklet to the outside. Repeat on each booklet. After about 4 booklets have been sewed together, tighten the excess string and be careful not to rip the paper when doing so. On the last booklet repeat the stitch (going inside and outside of the booklet) to strengthen the spine. Knot the thread on the outside of the booklets. Repeat on the opposite side of the booklets. For extra strength stitch the booklet in the middle if you feel it is necessary.
Step 8: Adding strength to the spine
Cut five pieces of thin cotton string (I used my household Dollar Tree supplies) about the length of the book. Glue the string to the spine of the book with school glue or Weldbond all-purpose at the top of the book and working your way down at equal distant intervals.
Glue the string onto the spin and half way down the page on both sides.
Clip the book together while the glue is drying. *Keep the excess string*
Step 9 (optional): Ribbon book markers
Cut your desired ribbon 2x's the length of the book.
Place glue up and down the entire spine and then place 3/4 of your ribbon on top. You'll want more length of the ribbon protruding and able to lay it inside the book with at least 1-2 inches of ribbon hanging out the bottom.
I had three ribbons including a much thicker ribbon so I glued down the first two thinner pieces, placed more glue on top of them and then added the thicker purple ribbon.
Add more glue on top of the ribbon and to the sides of the pages if the ribbon is touching.
Step 10: Cut a piece of paper (I used my extra dyed paper) the same length of the spine and wide enough to cover half of the book ON BOTH SIDES. Glue the paper along the spine ONLY.
Let dry.
Step 11: Cover
Use the cardboard on the back of the sketch pad,
Cut it in half,
and this should be the proper length of your booklets (without covering the spine)
For the spine I used a paper towel roll. It was not long enough to completely cover it so I cut the roll in half and used a smaller section to cover the remaining spine. If you have an empty wrapping paper roll you can cut that to the correct length instead.
Mark on the cut roll the width of the spine.
Fold on the lines to create the edge of the spine.
Glue down the roll first
Place lots and lots of glue on the spine.
Glue down the smaller piece first.
When adding the larger piece make sure to place glue on top of the overlapping smaller piece.
Then glue the cut cardboard to the rolls.
Make sure to leave a decent amount of roll on the spine showing, 1-2 inches in width.
I messed up a little at this part by making the spine less than half an inch thick which caused the cardboard covers to not completely cover the pages.
Clip the cardboard to the spine while it's drying, approximately 45 minutes.
Decorating:
Step 12: Start thinking of a name, I chose
Stergheria which is Italian for Witchcraft. This is part is also optional: to give the book an old-timey ancient/antique/authentic look I wanted the letters to raise up after I cover it with paper towel.
First paint the area where you will place your title, use the same string from the previous steps and map out your title and logo if desired. Let dry.
Step 13: Grab a couple of sheets of paper towel, glue, water, a bowl, and a paint brush.
1. Place 1/3 of a bottle of glue in the bowl
2. Add water (2 parts glue to 1 part water) to bowl & mix thoroughly
3. Use the paint brush to spread the "mod-podge" mixture across the whole cover
4. Dip one piece of a regular sized sheet of paper towel in "mod-podge"
5. Squeeze the extra liquid out and gently peel apart to return it to its original rectangular shape
6. Spread the wet towel across the book and MAKE SURE to press the towel down around the string, to where it hugs the string and will dry with definition. Repeat with different layers until the whole cover is covered.
7. Pull the excess sheet onto the interior of the cover.
8. Fold back the material and press on. You'll cover this later with another sheet of paper
9. Voilà!
Now let it dry!
About 1 hour, I left mine overnight.
Optional: after it drys, check if there are any area's that you want to repeat the mod-podge-towel steps on to give it more texture.
Step 14: Painting
After the cover has dried, grab your desired paint (I mixed black with brown) and make sure to paint to get into the crevices.
Even after you feel like you've painted a nice layer of paint over the entire cover, TURN THE BOOK UPSIDE DOWN and you'll probably find small white spec's of paper towel showing through.
Then I added gold accents by dipping the brush in gold paint, rubbing most of the paint off in my paint container and then brushed the raised areas of the cover.
Paint the folded part of the paper towel inside the cover.
After the paint has dried, spread a decent amount of glue on the cardboard cover backing and lay the first one of the sheets from the binded booklets on top.
Then add extra glue to the edges and brush down to secure the page to the cover.
Now you are done!...with the decorating.
Step 15: Time to fill those pages.
I started pinning spells, moon phases charts, pendulum swinging charts, tarot spreads, helpful kitchen witchery herbs, and so many more "witchy" book fillers on Pinterest.
*To make this step easier on yourself, have all of your "fillers" planned out. I wrote down my fillers on post it notes and stuck them on the pages*
Now this is going to be the longest part.
I have spent 5 days filling the pages and I think I've only finished 8 pages.
Keep in mind I'm not sitting down and doing this 24/7 around the clock,
the full-time job and cat needs me.
So here are some of my finished pages:
First page
My most recent/completed pages can be found
here.