Search This Blog

Showing posts with label halloween. Show all posts

Sunday, October 9, 2016

Re-do Beetlejuice costume

 Halloween is almost here!

The first jacket I taped up was very heavy and the stripes did not match the leggings I bought,
so Re-do it is.
I went back to the thrift store and the only thing I could find was a long white button down shirt but it looked good as an open jacket also.
Finished look: Under the jacket I wore a black corset with striped leggings and high heel boots. I sprayed my blonde hair green (a little too much- I looked like the Joker) and applied white powder to my face, purple eye-shadow and green shadow to my forehead.  

Materials:
  • White shirt/jacket (Goodwill $4)
  • Black electrical tape (2pk at Dollar Tree)
  • Scissors
  • Cork board (optional)
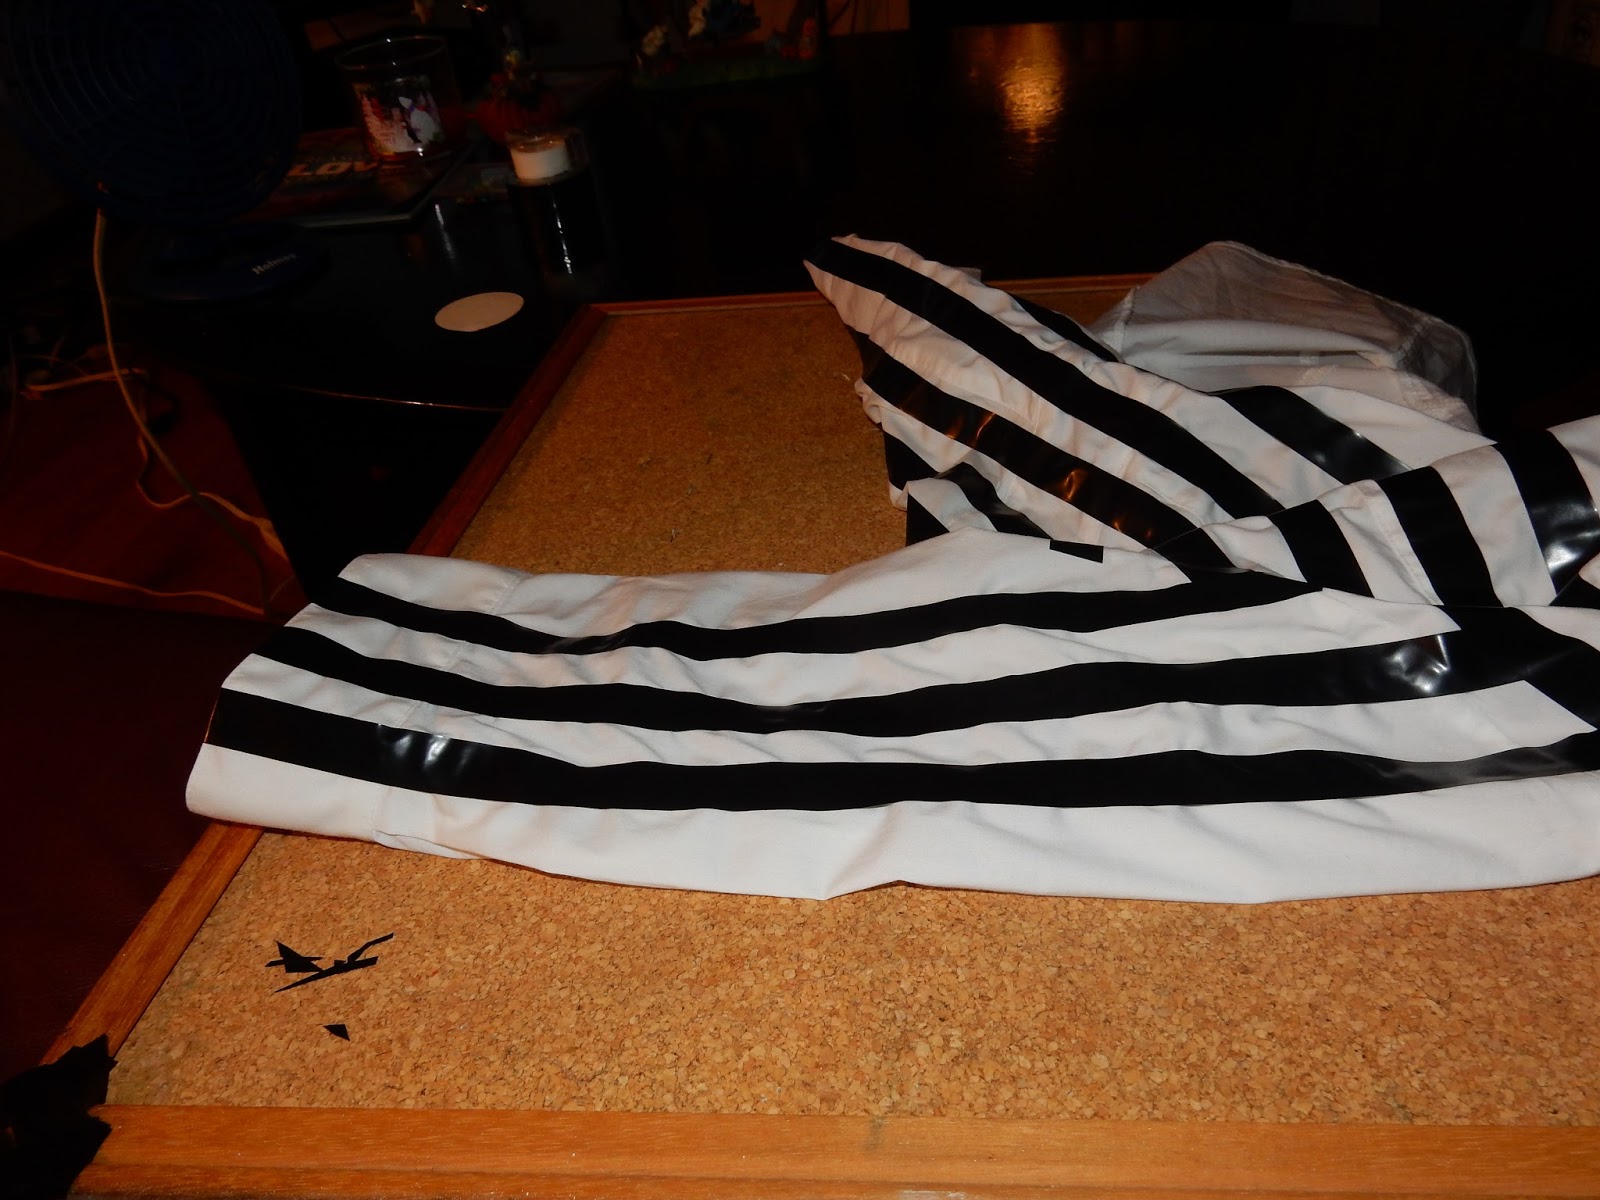
 I laid down a cork board in the shirt & then buttoned it up to make the shirt more stable.
 Depending on your pants you'll want to determine the width of the tape. My pants were just a little bit wider than the width of the electrical tape so I only laid down 1 strip of tape instead of the two I did with the last jacket. 
 Keeping on taping. 
For the arms I striped them vertically but in the movie Beetlejuice has horizontal sleeves. Horizontal sleeves tightened the material too much so I opted for vertical.
 For the sleeves make sure to tape them all the way to the end seam.
***When trying the shirt on I liked it better folded up to make it more fitted. It was easily taped inside with extra electrical tape. 
Image result for black lace up corset amazon
Black corset, bought in 2016 for $6 on Amazon but my oh my have those prices changed. 
I ordered an XL but could have gone down to a L. 

I purchased my leggings for $9.99 through Amazon but of course the price will change. 
Ajvani womens high heel block platform ankle low chelsea shoes boots booties
The shoes were pretty expensive, $15 plus $10 shipping on Amazon & no longer available.  

Wednesday, September 21, 2016

Beetlejuice Costume

 DIY Beetlejuice Costume 

Thrift store time!

I couldn't find a black and white striped jacket and buying it online was way too expensive for a costume I MIGHT wear twice.  So I looked and looked for just a white jacket which is somehow hard to find. I happened to try on other clothes  at Goodwill and in the dressing room the white jacket was waiting for me, score!
Supplies:
  • White Jacket 
  • Black electrical tape (2pk at Dollar Tree & I went through 3 rolls so buy 2 packs)
  • Scissors 
The jacket is a little large but when putting on the tape it makes it a tad but smaller and I ended up sewing the button to wear it tightened more. 
So looking at the jacket the arms are striped horizontal and the torso is vertical.
At first I striped a whole arm horizontal and then when I tried it on it scrunched up on my arm and also tightened too much. So its up to you if you want to make the original. I taped the other side of the jacket vertically and decided to go with that one. I already took the horizontal pictures so here they are. 
 Hold down the material so when laying down the tape it doesn't scrunch up. Start the tape on the inner seem on the jacket so it looks smooth. The electrical tape stuck well to the material and the lines looked seamless. 
I wanted a wider black line and made sure the white line was the same size. I laid two pieces of tape side by side to make the line thicker. I bought pants online and wanted to match the lines with them. I made the jacket before buying the pants but the picture looked similar. 
I ordered these pants through Amazon and the stripes look about 1-1 1/2 inch wide. $10 with Amazon prime and the reviews say they are not see-through (we'll see).
All the way up to the shoulder. 
Let the tape run over the shoulder seem, cut it later after making sure the vertical lines lay well. 
One side vertical and the other horizontal 
 So I started over on the horizontal arm and made it vertical.
Lay out the tape on the shoulder where some tape overlaps to the back of the shoulder. When working on the back attach the tape to the same overlapping tape to make the transition smooth from front to back.
Make sure to overlap the tap to the inside of the jacket at the bottom so it stays on. 
For the lapel I wanted to start with black so it popped more and it made the edges more pointy.
For the collar I used short pieces of tape and started inside the collar and overlapped on the backside, cutting away the excess later.

Wednesday, November 19, 2014

Looks like a REAL Spell Book: DIY Lovers

 Its almost Halloween! (Kinda)


& since I cannot decorate the outside of my condo I deck out the 
inside so much that it looks like a cross between A Nightmare
 Before Christmas and Hocus Pocus!

To make my house authentic looking I made a REAL looking 
spell book for decoration.

P.S. This is also cheap which is the best reason to craft!!!!!

I found this DIY project on Pinterest and decided it
was my turn to try it with the help of my unwilling roommates!


DIY looks REAL Spellbook


Supplies:
  • Text book or magic book in my case (a book with a larger surface area and thicker to look authentic) 
  • Cardboard
  • Plastic skeleton and plastic bat (I bought mine in a pack with other toys at Dollar Tree)
  • Thumbtacks
  • A couple of sheets of paper towel
  • 1 glue bottle (who can afford fancy Modge Podge!?)
  • Brown or black acrylic paint (base)
  • Gold, red, or tan acrylic paint (accent)
Materials:
  • Scissors
  • Hot glue gun
  • Bowl
  • Water
  • Unwilling roommate hands
  • Various sizes of paint brushes 


Step 1: Naming
When choosing a name I 
suggest picking something spooky. 

My roommates and I 
first thought of naming it Grimoire 
(we're watching Witches of East End) 
and then The Book of Shadows (I'm watching Charmed) but we wanted
 something else that was still spooky and original. 

So we used the handy-dandy search tool: Google and since we couldn't decide,
 my boyfriend thought of "nameless". We translated "nameless" in Latin
 (everything sounds better in Latin) which gave us "ignobiles"
 (according to one website)

Step 2: Cardboard cutting

Trace your chosen name on the cardboard. Scale it to the size of the cover space.
I tried to draw mine in  an older font. After drawing it out take a box cutter and cut
it out. Place the words around the top of the book, leaving room for the skeleton batman.
After placing your title where you want, hot glue the words down.

Step 3: Decorate!

So while the hot glue gun is on go ahead and glue designs on the
 face of the book such as a spider web or arrows, anything 
that will give the final look more detail.

Next take your plastic bat and cut off its wings. Position them on your cover and

then lay the plastic skeleton on top and then hot glue them down.
Also I would place thumbtacks around the boarder to give it a little more detail.

Remember to hot glue some decorations on the binding of the book.

To give it a little more ump you could spell out your title
again on the binding.


Step 4: Paper-mache time!
Mix 2 parts glue to one part water in a bowl, adding in more glue
if it is too watery. Dip a large sheet of paper towel in the "Modge Podge"
and then squeeze the excess out. Before placing the towel on cover
I suggest spreading out more glue, especially on the title and skeleton man. 
Then stretch out the towel on the cover. If the towel does not reach
the inside of the book add more damp towel. It is important that it is glued
on the inside or it will not stick! When spreading it out keep some 
of the creases on the book to give it more texture.  

Pay attention to the letters and the skeleton so that they are still accented.
Stretch the towel onto the binding of the book and then we wait!
I gave it a night (8 hours) 

This is the longest process but its worth it!
After it was dried I went back over it with a couple more sheets of damp towel
so it would have more texture.
 then waited...


                                    Front:                                               Back:


Step 5: Painting
After it has dried we paint!
The base paint should be a darker tone: black or brown.
Paint the inside cover too.

Step 6: Accent painting
So to get the authentic look the book has to look old, and old books
usually look like they have been worn out so I took light brown and brick red and
 mixed the two together. I took a small brush and dipped it into the paint
and then rubbed off the excess. I lightly stroked the raised  areas. 

Detail the title, the skeleton man, and the other decorations. I then rubbed
the brush onto the creases to give it more of a worn look. Don't forget to 
detail the edges of the book too! 

And anywhere that I accidentally added too much light brown paint 

I just retouched with black paint so mistakes can be made.


Finished front:


Finished back:


& here is a link to the blog where I found this original DIY project.

DIY Mary Sanderson Costume

DIY Mary Sanderson costume from the thrift store.                                     It's just a bunch of Hocus Pocus!  DIY video: Find...